

Is Chuck Eye Steak Actually Worth Cooking?
If you’ve ever skipped over chuck eye steak at the store, I completely get it. It’s not marketed like ribeye or sirloin, so it doesn’t immediately stand out. But in my experience, once you cook it the right way, it becomes one of the most underrated cuts you can use at home.
Chuck eye steak comes from a similar area as ribeye, which is why it carries a rich, beefy flavor. The texture is slightly firmer, but that’s exactly why technique matters here. When handled properly, it turns out juicy, flavorful, and surprisingly satisfying.
What really makes it worth cooking is the value. You get great flavor without paying premium prices. And once you understand the best way to cook chuck eye steak, it becomes something you’ll want to make again.
What You Should Know Before You Start Cooking
Before you begin cooking, there are a few important things to understand about this cut. Chuck eye steak isn’t as forgiving as more tender cuts, so small mistakes can affect the final result.
Here are a few things I always keep in mind:
- It benefits from a combination of searing and finishing
- Overcooking can make it tough very quickly
- Resting after cooking is essential for juicy results
- Thickness of the steak affects cooking time
In my experience, knowing these basics helps you avoid most common mistakes and improves your overall results when following any chuck eye steak recipe.
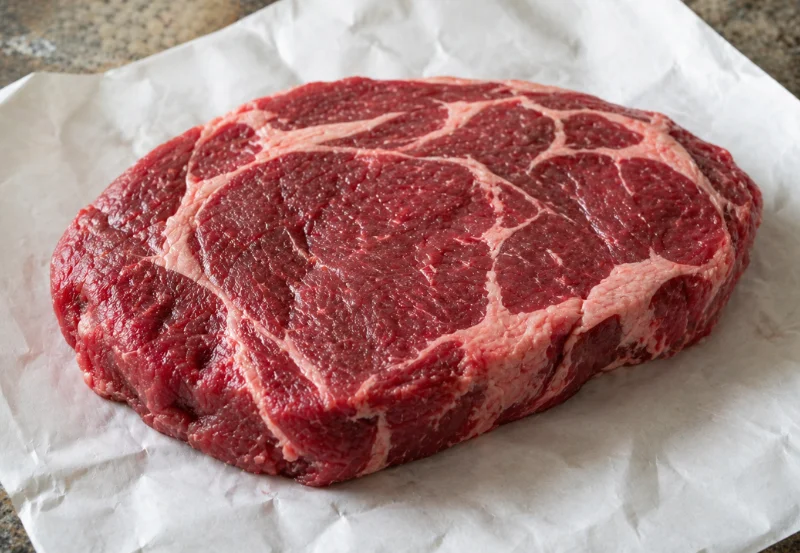
Choosing the Right Chuck Eye Steak at the Store
Selecting the right steak makes a noticeable difference before you even start cooking. Not all cuts are the same, so it’s worth paying attention when you’re at the store.
Here’s what to look for:
- Good marbling throughout the meat
- Bright red color indicating freshness
- Even thickness for consistent cooking
- Minimal excess liquid in the packaging
From what I’ve seen, marbling plays the biggest role. The more evenly distributed fat you have, the more flavorful and tender your chuck eye steak will turn out after cooking.
Simple Seasoning That Brings Out Real Flavor
You don’t need a long ingredient list to make this steak taste great. In fact, simple seasoning works best for a good chuck eye steak recipe.
I usually stick with:
- Salt
- Black pepper
- Olive oil or butter
Optional additions:
- Garlic
- Fresh herbs like rosemary or thyme
In my opinion, keeping it simple allows the natural flavor of the steak to shine. Over-seasoning can actually take away from what makes this cut enjoyable.
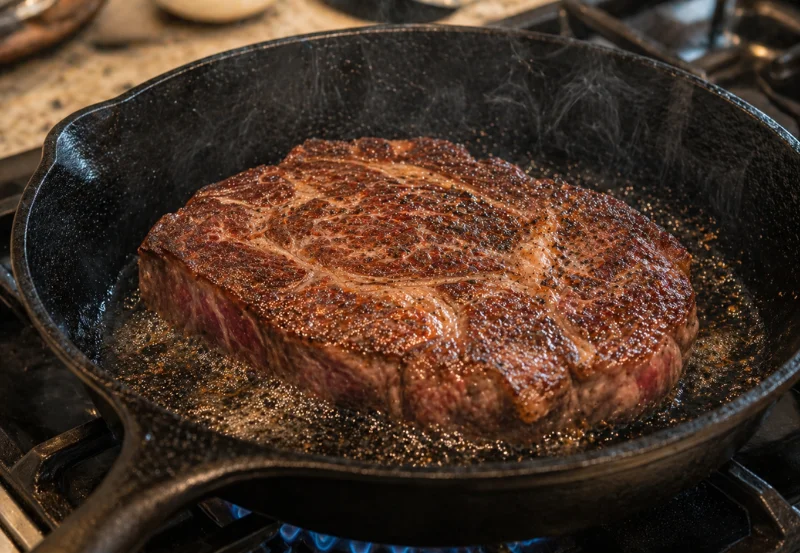
Pan Sear First: The Step Most People Skip
Searing is where the flavor really starts to develop. A hot pan creates that outer crust that adds both texture and taste.
Start by heating your pan until it’s properly hot, then add a bit of oil and place the steak in without moving it for about 2 minutes per side. This allows a crust to form instead of steaming the meat.
From my experience, skipping this step is one of the biggest reasons people don’t get the most out of their chuck eye steak. It’s a simple step, but it makes a noticeable difference.
Finishing in the Oven for Even Cooking
After searing, transferring the steak to the oven helps cook it evenly from the inside. This is especially useful if your steak is thicker.
Set your oven to 400°F (200°C) and let the steak finish cooking based on your desired doneness. This method gives you better control and reduces the chances of burning the outside.
If you’re still learning how to cook chuck eye steak, this approach is one of the most reliable ways to get consistent results.
Grilling It the Right Way Without Drying It Out
Grilling adds a different level of flavor that many people prefer, especially for outdoor cooking. A grilled chuck eye steak can turn out excellent if done correctly.
To get better results:
- Preheat the grill to medium-high heat
- Sear over direct heat first
- Move to indirect heat to finish cooking
- Avoid flipping too frequently
In my experience, controlling the heat is key. Too much direct heat for too long can dry the steak, so finishing it gently makes a big difference.
Steak Doneness Guide You Can Actually Follow
Here’s a simple chart to help you cook your steak to the level you prefer:
Desired Doneness | Searing Time (per side) | Oven Time (after searing) | Grill Time (after searing) | Internal Temperature |
Rare | 2 minutes | 3–4 minutes | 1–2 minutes | 120°F |
Medium Rare | 2 minutes | 4–5 minutes | 2–3 minutes | 130°F |
Medium | 2 minutes | 5–6 minutes | 3–4 minutes | 140°F |
Medium Well | 2 minutes | 6–7 minutes | 4–5 minutes | 150°F |
Well-Done | 2 minutes | 7–8 minutes | 5–6 minutes | 160°F |
Cooking time may vary slightly depending on steak thickness and heat level, so using a thermometer gives the most accurate results.
How to Tell It’s Done Without Guessing
If you don’t have a thermometer, checking doneness can feel uncertain. You can use touch and visual cues, but it takes practice to get right.
That’s why I recommend using a thermometer when possible. It removes guesswork and gives consistent results. Once you become familiar with the process, you’ll feel more confident cooking any chuck eye steak recipe.
Letting It Rest: Why It Matters More Than You Think
Resting the steak after cooking is one of the most important steps. When you let it sit for about 5–10 minutes, the juices redistribute throughout the meat.
If you cut it immediately, those juices escape, and the steak becomes less flavorful and slightly dry.
From my experience, this step is what keeps your chuck eye steak juicy and enjoyable.
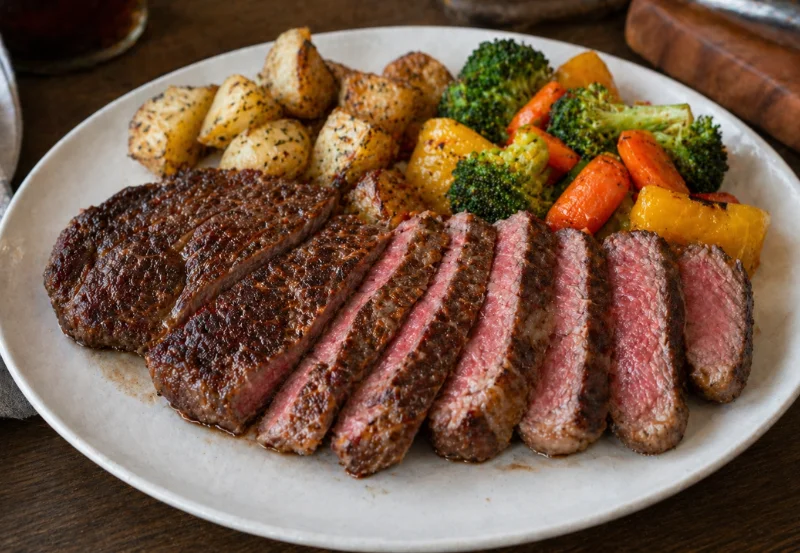
Serving It Without Overcomplicating the Meal
You don’t need complicated sides to make this meal work. A simple setup usually works best.
Pairing your steak with basic sides like vegetables, potatoes, or a salad keeps the focus on the main dish. The goal is to let the flavor of the steak stand out.
In my opinion, simple meals often feel more satisfying because they don’t try to do too much.
Mistakes That Make Chuck Eye Steak Tough
There are a few common mistakes that can easily affect your results.
Overcooking is probably the biggest issue. Since chuck eye steak isn’t as tender as some other cuts, cooking it too long makes it tough. Skipping the sear or using low heat can also reduce flavor.
Another mistake is cutting into the steak too early, which causes the juices to escape.
From my experience, avoiding these mistakes is just as important as following the correct cooking method.
Small Changes That Improve Every Result
Small adjustments can completely improve your results when cooking this steak.
Here are a few things I always follow:
- Bring the steak to room temperature before cooking
- Use high heat for searing
- Season just before cooking
- Let it rest properly after cooking
These small habits consistently improve the outcome of any chuck eye steak recipe.
Why This Method Works Better Than Others
What makes this method effective is the combination of techniques. You’re not relying on just one step—you’re building layers of flavor and control.
Searing creates a crust, the oven or grill finishes the inside evenly, and resting keeps everything juicy. This balanced approach works better than using just one cooking method.
In my experience, this is the most reliable way to get consistent results every time.
Final Thoughts
Chuck eye steak might not be the most popular cut, but it definitely deserves more attention. With the right technique, it can turn into a flavorful and satisfying meal without much effort.
Once you understand how to handle it properly, cooking it becomes simple and repeatable. Whether you prefer the oven or a grilled chuck eye steak, the result can be just as enjoyable.
And honestly, once you get comfortable with it, you’ll realize that the best way to cook chuck eye steak is all about doing the basics right—nothing complicated, just smart cooking.
